Live Streaming with RTMP

Summary

Zoom supports streaming to Facebook, YouTube, or a custom service. In each case, Zoom uses the RTMP protocol to steam the meetings.

What is RTMP?

Real-Time Messaging Protocol or RTMP is a protocol for streaming audio, video, and other data across the internet. RTMP works over TCP (port 1935 by default) in order to deliver a persistent and low latency connection.

Continue reading this thread for use cases, examples, and further resources.

1 Like

Use Cases

:tv: YouTube and Facebook

The primary use case for livestreaming is to bring your Zoom meeting/webinar to a different platform. This might be because you’ve built an audience there or because it adds to how discoverable your event is or simply because you can distribute your recorded content easier on that platform.

For example, if you have an established YouTube channel it makes the most sense to stream the event to your subscribers and/or have it available for them directly on YouTube.

Another common use case for live streaming is to offload additional attendees when an event is full. For example, when using YouTube or Facebook as your streaming service, you can redirect participants to the live stream. This allows them to watch and engage with the content where they otherwise wouldn’t be able to.

:gear: Custom Services

There are quite a few use cases for utilizing a custom service and that is because this option is designed to allow developers to receive an RTMP stream of the meeting at an endpoint they provide. This enables developers to record the live stream or parse audio and video.

An example of this would be a service that offers analytics on meeting content. They might need to analyze the audio and video to create a transcript and gather details needed for their service.

After, they could overlay their data on a recording of the meeting captured through live stream.

Example

:tv: YouTube and Facebook

For the most part, using an established service is straightforward. If you want to live stream to YouTube or FaceBook there are guides you can find such as the ones below to create an account and get started with Zoom:

Example

:gear: Custom Services

The quickest way to get started testing with a custom service is to pull an existing project. For this example, we’ll be using a Github project called Node Media Server to create a simple RTMP server to receive and view the stream data.

Prerequisites

  1. Follow the steps in this guide to enable live streaming on your account
  2. Download and Install NPM
  3. Download and install FFMPEG
  4. Download and install Ngrok

Getting Started

Download and Install Node Media Server

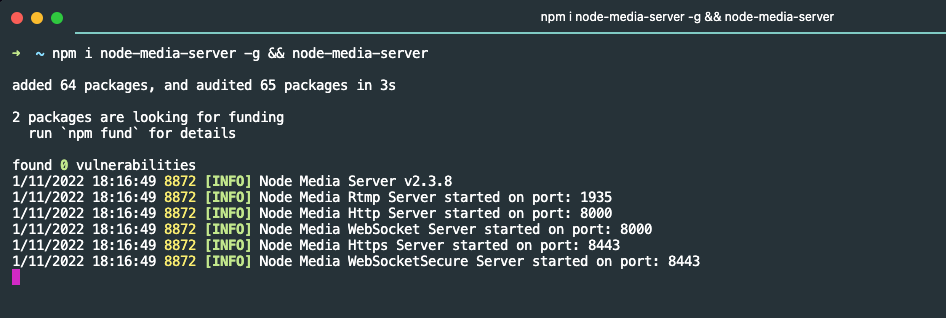
At the time of writing, the quickest and easiest way to get set up is to run the following command in a shell terminal:

npm i node-media-server -g && node-media-server

Here’s a screenshot of what that looks like:

Log in to the Media Server

You can navigate to http://localhost:8000/admin to see the web portal for your new server. Log in with the username admin and the password admin.

You’re the proud owner of a brand new RTMP server! :tada:

Test the Server

In a new terminal window, you can now use FFMPEG and an MP4 file that you’ve downloaded to test the RTMP server. If you are looking for a video to use, you can download the sample videos found here.

Example Command for H.264 and AAC

ffmpeg -re -i INPUT_FILE_NAME -c copy -f flv rtmp://localhost/live/STREAM_NAME

Example Command for Other Formats

ffmpeg -re -i INPUT_FILE_NAME -c:v libx264 -preset veryfast -tune zerolatency -c:a aac -ar 44100 -f flv rtmp://localhost/live/STREAM_NAME

Once we are streaming to the server, we can view that stream by navigating to http://localhost:8000/admin/streams

Clicking the stream name will allow us to view the content being streamed to the server:

Streaming From Zoom

Now that we have confirmed the server accepts RTMP streams, we’ll need to set up our server so that it is accessible to Zoom.

Currently, it’s hosted on localhost, and in order to make the server accessible publicly, we’ll need to use Ngrok.

Start Ngrok

In a new terminal window, we’ll tell Ngrok to forward TCP traffic for port 1935 (the default RTMP port) through our public tunnel

ngrok tcp 1935

Your terminal window should look like this:

image

Make sure to save the forwarding URL which in this case is tcp://2.tcp.ngrok.io:14905

:warning: Each time you restart Ngrok the forwarding URL will change unless you have a paid plan
:warning: Using Ngrok impacts the latency and bandwidth of the stream. Do not use Ngrok for performance or latency testing.

Configure Zoom

The next step is to set up Zoom with our new live streaming server. We’ll just need to enable the feature on our account, fill out some information in Zoom and then we can view the stream from our server.

Configure Your Account

Make sure that you are testing with a Pro Plan or higher and that you have enabled Live Streaming for meetings on your account.

Create and start a Meeting

Create a new meeting that we will live stream. Open the latest version of the Zoom client and start the meeting

Configure Live Streaming

Click the three dots in the lower right-hand corner of the action bar and then click Live on Custom Live Streaming Service .

You will be presented with a browser page to fill in your live streaming server’s information:

image

:information_source: You can use the Update a Live Stream API to set this information programmatically

The Streaming URL is the base URL where your stream should be transmitted. It is the same URL that you used in FFMPEG but without the /STREAM_NAME path at the end. This is because STREAM_NAME is the Streaming Key in this case.

The Steaming Key has its own field in Zoom and will be appended to the Streaming URL so that the built URL is rtmp://3.tcp.ngrok.io:28098/live/ZOOM

As this is the name of the stream, the Streaming Key can be whatever you choose.

The Live Steaming Page URL is the URL where you can view your stream. As this is just a test server, our best option is to redirect to the streams page. To do this, we can start ngrok on port 8000 using ngrok http 8000 and use that URL.

Click Go Live! to return to the meeting.

View Your Broadcast

Now that we are streaming our meeting to our new RTMP server, we’ll want to make sure this stream is working as expected.

Navigate to http://localhost:8000/admin/streams to see the ZOOM stream listed:

Clicking on that stream will present us with the Zoom Meeting that is being streamed to our server:

:tada: :balloon: Congratulations! You’re now live streaming your Zoom Meeting to your own server! :balloon: :tada:

Example

:sound: Parsing Audio From RTMP Streams

If you want to parse audio from RTMP for a production application, you would import libraries such as FFMPEG and perform the parsing, remuxing, and file writing directly from your programming language.

However, in the interest of keeping this guide concise, I’ll demonstrate how you can parse audio from an RTMP stream via the terminal. In the future, we’ll release a sample application that goes into more detail.

Prerequisites

  1. Download and install FFMPEG

Listen for RTMP traffic

The following command will listen for RTMP traffic sent to your local machine. It then copies the data and only writes the audio to an output file. The same could be done with video.

ffmpeg -listen 1 -i rtmp://localhost/live/STREAM_NAME -vn -acodec copy output-audio.aac

Stream to FFMPEG

Now that we have a server running, open a new terminal window. In the new window, provide the command that you used earlier to stream a video to your server:

ffmpeg -re -i ~/Downloads/sample-mp4-file.mp4 -c copy -f flv rtmp://localhost/live/STREAM_NAME

When the stream is complete, you can open output-audio.aac and listen to the audio from the stream.

Troubleshooting

If you’re having trouble connecting to your RTMP server through the ngrok tunnel ensure the following:

  1. You are referring to the URL using the correct protocol. You’ll want to use rtmp:// for the TCP URL you get from Ngrok
  2. You are including the port on your Ngrok URL
  3. You are not under a VPN
  4. Port 1935 is open for inbound and outbound on your machine

You may run into issues with the encoding or container of your test video. If so, you can use the following test video which uses H.264 and AAC.

For any other issues feel free to reach out to me directly!

:books: Resources

https://www.cloudflare.com/learning/video/video-encoding-formats/

1 Like

Hi @MaxM ,

I have an issue where the audio in the Zoom Cloud & Local Recordings are always in Mono even if the audio in the meeting is being broadcast in stereo. I have been advised that there isn’t a way in Zoom to get around this.

So what I would like to do is stream the meeting to another platform so that we can then serve the recorded meetings there instead of Zoom. However, when trying to stream the meeting to various different platforms (YouTube, Facebook and then custom solutions like DaCast), the audio in the outputted stream is always mono.

So does you (or anyone else) know of a way where I can stream a session from Zoom but with stereo audio or is the audio always resampled to be mono BEFORE it gets sent to the relevant RTMP server?

@roperjonathan If audio is sent in mono then I’m not aware of that. Have you tested your mic and audio interface? If you’re using an XLR mic or a high-end mic then often you’ll want to downmix from mono to get stereo output from the mic.

Let me know if that’s helpful. If not, I’ll look into this further.

This topic was automatically closed 30 days after the last reply. New replies are no longer allowed.